Natural stone is honest material. It rewards care with decades of service and character, but it also remembers shortcuts. I have walked into homes where a marble vanity looked foggy after one month, and limestone floors dulled under kitchen chairs in a single season. The good news is that stone rarely fails on its own. Most problems trace to predictable culprits: the wrong cleaner, missed sealing, or habits that grind grit into the surface. With a clear plan and a little discipline, you can keep stone surfaces sharp, sanitary, and easier to live with.
Understanding what you’re working with
Every stone has a personality. You can group them into two broad families that behave differently in a home.
Calcite-based stones include marble, limestone, and travertine. They are reactive to acids. Lemon juice, vinegar, wine, and many bathroom products can etch their surface. Etching is not a stain, it is a physical change at the top layer that leaves a dull mark or light spot. These stones are relatively soft, which means they scratch more easily and show traffic patterns sooner. On the upside, they accept a high polish and can be rejuvenated through marble restoration techniques when they lose their luster.
Silicate-based stones include granite, many slates, quartzite, and certain gneisses. They are harder and generally more resistant to scratching and etching. Granite restoration usually deals with wear patterns, minor chips, and sealer management rather than acid damage. Some granites and quartzites are very dense and resist staining, while others are more porous than expected. A quick absorption test tells you what you have: place a few drops of water on a clean surface and watch. If the spot darkens within a couple minutes, the stone is thirsty and will benefit from sealing. If it stays unchanged for ten https://nyc3.digitaloceanspaces.com/natural-stone-restoration/natural-stone-services/index.html minutes or more, it is dense and needs less frequent sealing.
This difference between reactive and nonreactive stones is the core of almost every maintenance decision. Choose cleaners and techniques with that in mind and you’ll avoid most headaches.
Daily habits that prevent damage
The biggest gains come from small actions repeated consistently. I keep the daily routine simple so it actually happens.
Use the right cleaner. For all stone, pick a pH-neutral cleaner designed for natural stone. It should say so clearly on the label. On calcite-based stones, avoid vinegar, lemon, bleach, or any acidic product. On granite and quartzite, harsh alkaline degreasers can strip sealer and leave a film. If you are unsure, dilute the cleaner more rather than less, and test in an inconspicuous corner.
Keep dry grit off the floor. Grit is sandpaper under shoes. Entry mats inside and outside doors, changed or shaken weekly, make a measurable difference. In kitchens, a sweep every evening keeps sand and salt from acting like 80-grit under chair legs.
Wipe spills immediately. Oil, wine, coffee, and citrus are the usual offenders. On marble and limestone, standing orange juice can etch in minutes. On granite, cooking oil can migrate into pores and leave a dark spot overnight. A clean cloth and a neutral cleaner solve 90 percent of these incidents.
Mind furniture and appliances. Chair glides should be felt, not metal or plastic. Replace them when they compress. Refrigerator installers sometimes drag appliances a few inches to align them. That move can leave a perfectly straight scratch across otherwise pristine stone. A moving blanket and furniture sliders avoid the problem.
In bathrooms, rinse and dry vulnerable surfaces. Hard water deposits can set into travertine shower walls, then etch when homeowners reach for acidic removers. A quick squeegee after the last shower of the day cuts mineral buildup dramatically.
These habits do not take long, and they reduce the need for corrective procedures like stone scratch repair or stone etch removal.
Cleaning that doesn’t shorten the life of your stone
Most surfaces fail early because of well-meaning but poor cleaning practices. I have seen marble dulled by frequent scrubbing with powdered cleansers, and granite sealed into a sticky mess by overapplication.
Use soft tools. Microfiber towels, soft cotton cloths, and nonabrasive mop heads are the baseline. Avoid scouring pads on calcite stones. On granite, a white nylon pad used gently can remove stuck debris without harm, but test first.
Dilute correctly. More soap is not better. Overconcentrated cleaner leaves residue that dulls a polished finish and attracts soil. Follow the label or dilute slightly more for leave-on sprays.
Rinse sometimes. In kitchens, alternate between a cleaner and a plain water wipe, particularly on counters that see daily cooking. This removes surfactant buildup and keeps stone bright.
Avoid steam on sealed stone. Steam mops can break down some topical sealers and push moisture into pores where it does not belong, especially on tumbled travertine or honed limestone. If you love steam for sanitation, use it sparingly and keep the head moving.
Choose poultice over scrubbing for stains. When oil or wine has migrated below the surface, scrubbing the top accomplishes little. A poultice uses an absorbent material and a chemical that draws the stain out. You can make simple poultices with baking soda and water for oil stains on granite, or buy ready mixes formulated for natural stone repair. Apply, cover, let it dry, and repeat if needed. Scrubbing too aggressively risks scratching or opening the pores further.
Good cleaning is the cheapest part of professional stone care because it preserves the finish you paid for, whether you inherited it from a previous owner or had it installed last month.
Sealing without superstition
Sealer is not a force field. It reduces the rate at which liquids are absorbed, buying time to wipe spills and preventing many stains from setting. It does not stop etching on marble or limestone. Yet sealing correctly remains one of the smartest moves you can make.
Penetrating sealers are the standard for most natural stone restoration. They soak into the pores and leave very little on the surface. Topical coatings, often shiny and soft, are a different category. Unless you are dealing with a special circumstance, stick with penetrating sealers and avoid topical coatings in kitchens and bathrooms.
How often to seal depends on use and porosity. For a busy kitchen with honed marble, a good rule is every 6 to 12 months. For dense granite counters, every 2 to 4 years is enough. Floors vary widely: travertine in a foyer may benefit from annual attention, while tight-grained granite can go several years. Test your stone with water droplets and watch how quickly the color change occurs. When it darkens within a few minutes, the surface is ready for stone cleaning and sealing.
Prepare before sealing. Clean the surface thoroughly, let it dry completely, and remove any waxes or oils. Moisture in the pores fights the sealer for space and reduces effectiveness. In humid climates, giving countertops a full day to dry before sealing pays off.
Apply sparingly, wipe completely. Most penetrating sealers call for a wet coat that sits for a few minutes, then a complete buff-off. If sealer dries on the surface, it can leave a sticky film that attracts dirt. When in doubt, apply less and do a second cycle rather than flooding the stone.
Call stone sealing specialists for large floors, tricky materials, or when you see streaks after DIY attempts. Professionals bring commercial vacuums, pads, and chemistry that speed the process and avoid residue. A two-person crew can clean and seal a 600 square foot floor in a morning, something that can take a homeowner all weekend.
Dealing with etches, scratches, and chips
At some point, damage happens. Knowing what can be fixed at home and what needs expert work will save time and money.
Etching looks like a dull, light mark on an otherwise glossy or honed surface. On polished marble, light etches can sometimes be improved with a quality marble polishing compound and a soft cloth. Work a small area with patience. If the mark is rough to the touch or large, you are into resurfacing territory and should consider marble polishing services. Professionals will re-hone or re-polish the area, then blend it to the surrounding finish.
Scratches appear as lines that catch light. On honed stones, very light scratches can be softened with a hand honing pad, starting fine and moving cautiously. On polished marble or granite, hand attempts often leave a low spot or haze. Proper stone scratch repair uses a sequence of abrasives, increasingly fine, followed by polishing. It is easy to overdo it in a kitchen where the lighting will highlight any unevenness. If the scratch is deep enough to catch a fingernail, call a pro.
Chips on granite edges near sinks are common. Small chips, the size of a sesame seed, can be filled with a color-matched adhesive and leveled. This is detail work but within the reach of a careful homeowner who practices on a scrap first. Larger chips near corners require technician experience and often a combination of fill and micro-polishing to blend the sheen.
Cracks are different from fissures. Many granites have natural fissures that look like hairline cracks but are stable and smooth. A true crack has edges you can catch with a fingernail and sometimes a slight height difference. These require structural repair, not just aesthetic blending. A professional will assess whether the substrate needs reinforcement and whether stone countertop restoration is viable in place.
If you are ever unsure whether a mark is a stain or an etch, do a quick test with a damp cloth. If the mark disappears when wet and returns when dry, it is probably an etch changing the way light scatters, not a pigment stain. That distinction determines whether you reach for a poultice or a polishing compound.
Floors, counters, showers, and exterior stone each need a tailored approach
Stone floor restoration has different goals than countertop work. Floors endure traffic, grit, and chair movement. Counters face acids, oils, knives, and heat. Showers see moisture, soap, and minerals. Exterior stone gets full sun, freeze-thaw, and biological growth. Adjust your maintenance plan accordingly.
For floors, routine vacuuming is underrated. A canister vacuum with a hard floor head pulls grit from grout joints and pitting. Damp mopping with a neutral cleaner keeps soil from abrading the surface. When traffic lanes appear dull, you can often rejuvenate them with a light honing and polishing cycle. In homes with large limestone or travertine areas, a professional stone floor restoration every few years returns the finish and resets the maintenance clock. If the floor is heavily pitted travertine, filling open voids periodically prevents edges from crumbling under heels and chair legs.
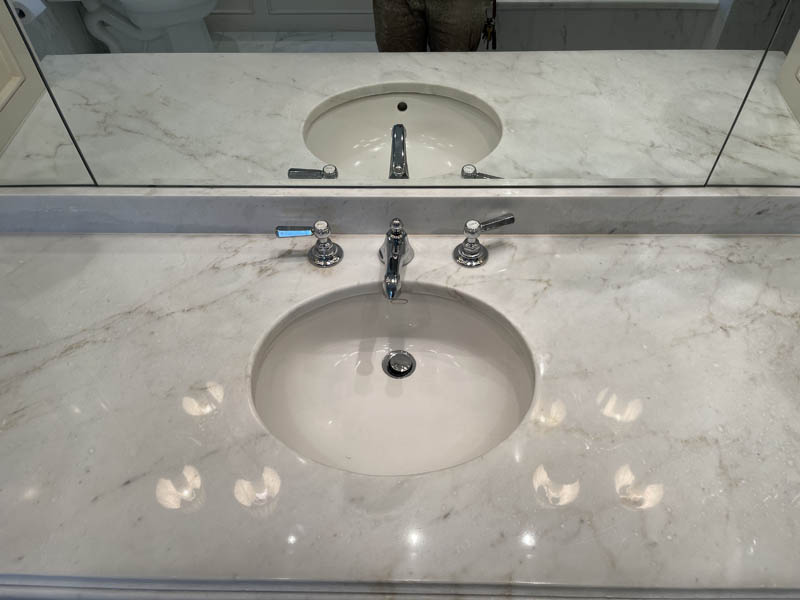
Counters benefit from cutting boards and trivets, but many people prefer the feel of stone under knives. If that is you, accept that tiny micro-scratches will accumulate. On honed surfaces they mostly blend. On polished surfaces, they read as a general haze in backlighting. Stone polishing and sealing brings the sparkle back when the haze becomes distracting. Near sinks, wipe water regularly and watch for mineral buildup. A nylon brush and neutral cleaner keep the silicone line clean without biting into the stone.
Showers mix chemistry and heat. Soap scum is alkaline, while many DIY removers are acidic. On marble or limestone, that acid can etch instantly. Use a stone-safe soap film remover or a neutral cleaner with a longer dwell time and a soft brush. Ensure good ventilation and take a minute to squeeze out water after use. If you inherit a shower with deep etching and heavy mineral deposits, natural stone restoration by a pro can re-hone walls and reset expectations. Sealing shower walls helps with staining, not etching, but it still pays off around shampoos and dyes.
Exterior patios and steps often involve slate, granite, or travertine. Algae and moss add slip risk and can stain. A low-pressure rinse, neutral cleaner, and a soft brush beat high-pressure blasting that opens pores and roughens the surface. If winters freeze where you live, avoid salt on calcite stones. It can spall the surface. Use a calcium magnesium acetate product instead and rinse when spring returns. Resealing exterior stone every year or two offsets sun and weather exposure.
Material-specific nuances that matter
Marble restoration thrives on patience. Polished marble shows everything. If you favor that mirror look in a kitchen, commit to coasters, prompt wipe-ups, and quick response to etches. Many homeowners choose a honed finish for workhorse spaces, which hides minor wear and takes a more forgiving repolish. When a marble island reaches a certain level of micro-etching, a professional re-hone creates a uniform, soft sheen that feels clean every time you wipe it.
Granite restoration revolves around stains, chips, and uneven sheen. Not all granites are equal. Some black granites are dense and take a brilliant polish, but they can show fingerprints. Others have lighter minerals that undercut during polishing and create a subtle texture. Matching an existing sheen during stone surface restoration requires inspection under both ambient and raking light, and sometimes two or three test spots to hit the right gloss level.
Limestone restoration typically deals with uniform wear. Limestone tends to wear evenly across a floor, which is good, but it also picks up traffic lanes faster than harder stones. On large floors, a diamond-honing process in several steps followed by a penetrating sealer gives you a clean, matte finish that resists scuffs. Avoid trying to force a high, glassy shine on soft limestone. It rarely holds and can look blotchy.
Travertine restoration often includes filling. Travertine forms with voids. Some are filled at the factory, and some open over time. When chairs or heels break edges, the floor looks peppered. A skilled technician fills and colors these voids, then hones the surface to a uniform finish. You can live very happily with a honed, filled travertine floor that sees heavy traffic, as long as you keep grit off and reseal periodically.
When to call professionals and what to expect
There is a line between household care and professional stone care. Cross it when the finish has changed, the surface feels uneven, or DIY fixes become recurring chores. Professionals bring specialized abrasives, dust control, lighting, and an eye for detail that only comes from doing this work daily.
Expect an assessment first. A reputable company will ask about the material, age, and issues. They will test a corner for etch response, absorption, and hardness. For stone surface restoration, most crews will mask adjacent surfaces, set up containment if dust might be generated, and work in stages. In a typical kitchen, marble polishing services might start with a light honing pass to even the surface, followed by a polishing sequence, then stone cleaning and sealing. On a 60 square foot island, the work can take 3 to 6 hours depending on starting condition.
Costs vary by region and scope, but a useful way to think of it is per square foot for floors and per piece for counters and vanities. Light maintenance polishing might run in the single-digit dollars per square foot, while full restoration of damaged marble can climb from there. Chips and isolated etches often have minimum service fees. Ask for clarity about what finish you want, from matte to high polish, and confirm that the crew will blend edges and transitions, not just treat the field.
The best stone restoration services leave you with a care plan: which cleaner to use, how to test sealer annually, and how to spot issues early. If you do not get that guidance, ask for it.
Simple routines that extend the time between restorations
A few tiny habits can double the interval between major work.
- Keep a spray bottle of pH-neutral stone cleaner and a stack of microfiber towels in the kitchen and each bathroom. Quick access speeds action and prevents etches and stains. Do a monthly five-minute inspection under good light. Look for dull rings, darker patches near cooktops, or grit lines at doorways. Catching problems early makes them easier to fix. Test your sealer with water drops every few months where spills happen most. If darkening appears quickly, schedule stone polishing and sealing or a DIY reseal before holiday season. Replace chair glides and entry mats on a schedule, not after they fail. Old glides scratch. Flattened mats stop catching grit. Keep one poultice kit and one marble polishing compound on hand. The best time to remove a new oil spot or a fresh etch is the same day you notice it.
What not to do, no matter what a forum suggests
Internet hacks can cost you a resurface. A few stand out from years of remedial work.
Do not use vinegar, lemon, or bathroom acids on marble, limestone, or travertine. The temporary brightness you see is dissolved stone and opened pores, which dull faster later.
Do not wax kitchen counters. Wax attracts soil, shows fingerprints, and interferes with future professional work. If you like a higher sheen, pursue polishing, not topical coatings.
Do not over-seal. More sealer does not equal more protection. If the first application has filled the pores, the second sits on top and becomes sticky. Follow dwell and wipe-off instructions and stop when the stone no longer absorbs.
Do not sand isolated spots aggressively by hand on polished stone. You will create a visible dish that catches light. Blending requires a larger working area and a sequence of abrasives.
Do not rely on heat to remove oil stains. Heat can set oil deeper and expand pores unevenly. Use poultice methods and patience.
The case for seasonal maintenance
Homes run on rhythms. Tie stone care to existing habits. In spring, deep clean floors after winter grit and consider resealing entries. Before holidays, inspect kitchen counters where cooking will spike. In late summer, check exterior stone for biological growth and treat it before fall rains. For showers, replace any failing silicone annually and verify that grout lines are intact. A small bead of silicone can block water migration that would otherwise darken a marble jamb or threshold.
For families with kids or pets, add an extra sweep and a quick wipe of low cabinets and baseboards. Grit falls from the countertop edge and piles along toe-kicks where mops often miss. That is where shoe soles pick it up again and carry it into traffic lanes.
If you run a humidifier in winter, watch for condensation in bathrooms. A ceiling fan on a timer and a squeegee on a hook give you control without thought.
Planning for restoration before you need it
Think of stone like hardwood. It benefits from periodic professional attention. If you schedule light maintenance before the surface looks tired, the work is faster, cheaper, and gentler. For example, a honed limestone floor that gets a refresh every two or three years will avoid deep cuts later. A marble vanity with annual etch touch-ups will keep a consistent sheen, rather than oscillating between cloudy and overly shiny patches.
Choose partners who specialize in natural stone restoration, not a general janitorial service with a buffer. Ask what abrasives they use, whether they work dustless, and how they protect adjacent cabinetry and carpets. Good crews carry color charts for fills, gloss meters for finish targets, and they test products on site instead of guessing.
If you have mixed materials, like a kitchen with marble counters and a quartzite island, discuss the plan surface by surface. Different stones call for different pads and polishes, and switching chemistry during the day prevents cross-contamination that can leave a film.
A note on expectations, patina, and living with stone
Perfection in stone is not realistic, and it should not be the goal. A marble top used by a home cook will show soft rings if you chase a high polish. A honed finish forgives and looks handsome in daylight. Granite near a sink will collect fine scratches that disappear in normal light. Travertine will show small fills over the years. This is patina, and with good care it reads as character, not neglect.
At the same time, far too many homeowners live with damage they think is permanent. Stone surface rejuvenation can erase what looks like a fatal flaw: the white mark from a spilled cleaner on a limestone vanity, the dull circle under a plant on a granite bar, the traffic lane on a travertine foyer. When the surface stops responding to your daily routine, it is not a failure to call for help. It is maintenance, and it protects the investment you made in materials that are meant to last.
A short readiness checklist before you start any project
- Identify the stone. If you do not know, ask your fabricator, compare to samples, or have a pro test it. Treating marble like granite creates problems. Test absorption with water and test for etch with a tiny drop of lemon juice in an inconspicuous spot. One minute is enough to tell you what to avoid. Assemble the right tools: pH-neutral cleaner, microfiber towels, a nylon brush, a poultice kit, felt glides, and a penetrating sealer suited to your stone. Protect nearby materials. Blue tape along cabinet bases, plastic over wood floors adjacent to stone, and a clean bucket system prevent collateral mess. Document the starting state with photos under direct and raking light. It helps you judge progress and gives a reference if you call a professional later.
Stone is patient and honest. If you match it with the right habits and a few informed decisions, you get surfaces that carry family meals, busy mornings, and quiet evenings year after year. When the time comes for deeper work, partner with experts who focus on stone polishing and sealing, stain removal, and the subtle craft of blending sheen and texture. The payoff is not just a pretty surface. It is the calm that comes from wiping down a countertop that still feels solid and clean ten years after it was installed.
Natural Stone Services 1815 Hembree Rd, Alpharetta, GA 30009 (404) 255-8133